We’ve selected the JPEG format for our images. Other formats are more compact or provide higher fidelity but JPEG is the most common and is widely supported. If something comes along that becomes more popular than JPEG, it will be possible to convert to the new system.
The other reason to use JPEG is that the file format supports metadata within the file that describes the content of the file. For our purposes, the most interesting metadata that can be stored in a JPEG file is:
- Photo Caption
- Photo Description
- Date Photo was Taken
- Copyright Information
This is what allows you to have a simple, non-proprietary system to store your image files. The information describing the file is right within the file. You don’t need any external files to describe your photos – your files can describe themselves.
Using Windows Tools
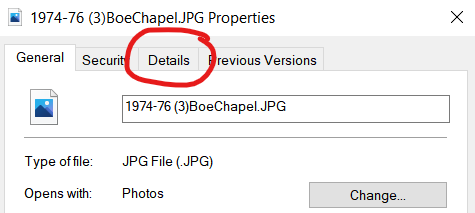
The easiest way to view and modify the metadata in a JPEG file is Windows File Explorer. Right click on the file and select Properties, then select Details:


The properties you see can be edited, then you can click OK to save them. Title and subject have been confused over the years – the voluntary standards for JPEG metadata are not reliably implemented. We recommend using Title as the caption, and Comments as the description. Copy the caption into Subject as well as insurance (some tools do this automatically).
Using Apple Tools
I’m sorry, but I don’t have a clue about Apple tools – but I’ll add some info when it get it.
Using EXIF Pilot
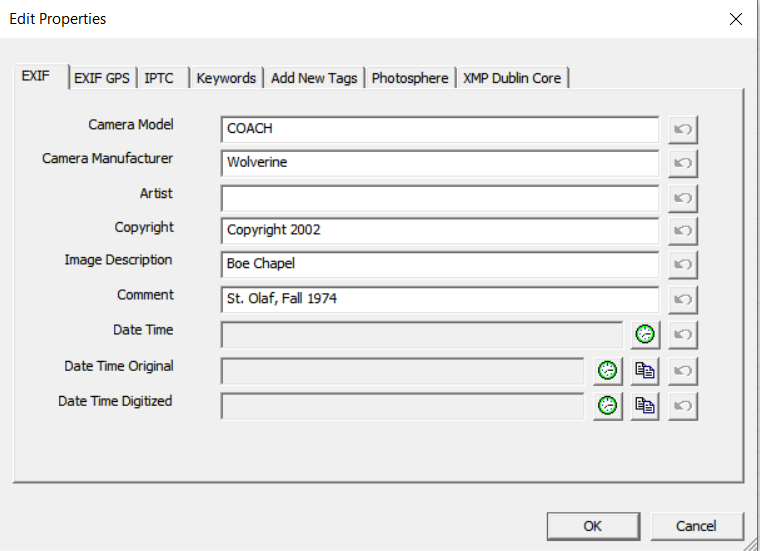
If you ignore the principle of only using software you pay for (and I often do) you can download EXIF Pilot from Two Pilots Software in Serbia (https://www.colorpilot.com). Simply double-clicking on the file of interest will open up the properties tab where you can edit EXIF data (EXIF is the particular type of JPEG metadata that interests us). Make you changes, and click OK. The call the title Image Description, and the rest are the same.

Using MetaCaption
The fourth option is a program Ted wrote to view and edit metadata on JPEG files. MetaCaption is written for Windows, and can be downloaded from a photo gallery page, after you’ve entered the security phrase.
Installation
First, uninstall any previous versions of MetaCaption you may have installed. Ted didn’t spend much time on this installer. Then, extract the contents of the .ZIP file to a real folder, perhaps on your desktop. It can not be installed directly from the .ZIP file. Then, run Setup.exe to install the program. Ted didn’t pay his Microsoft tax, so it will warn you about installing unknown software and such – just proceed with the installation. (BTW – I don’t expect this software to harm your computer or pictures, but it might. Another violation of the “pay for your software” principle.)
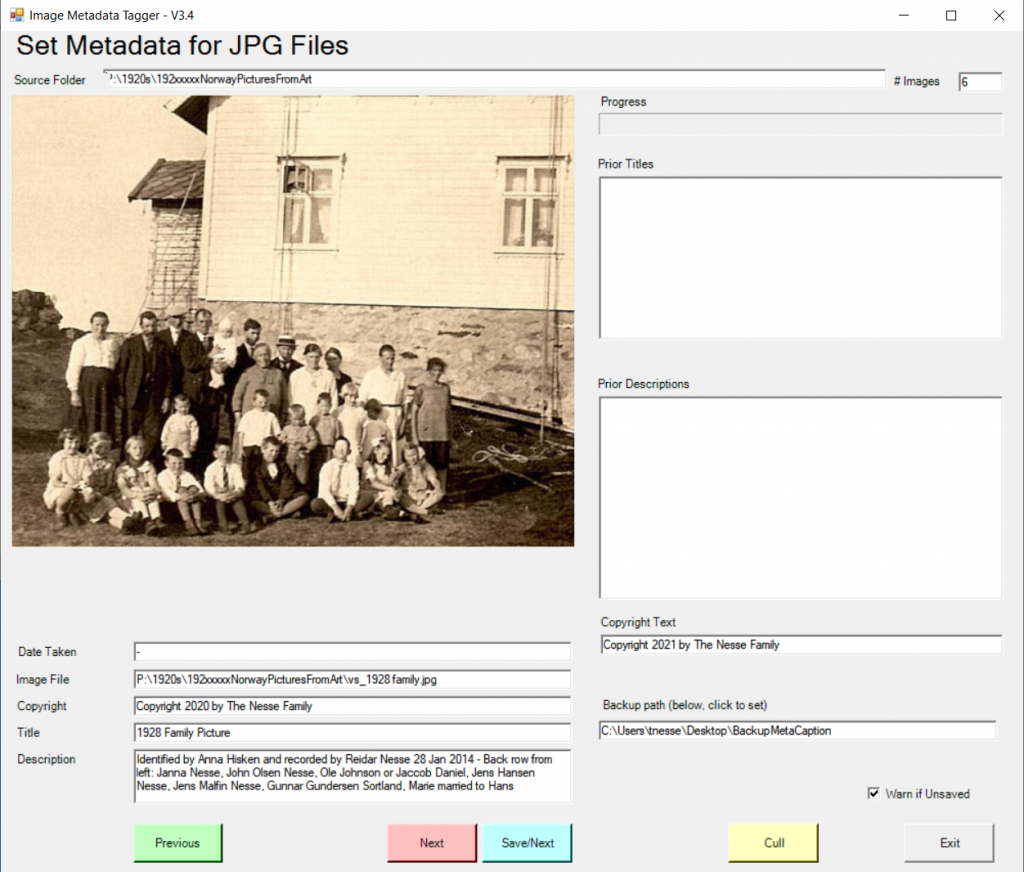
Run the program from the NLT Tools folder on your start menu, ignoring the “persistence” error the first time you run it. Here’s the main screen:

- Click on the Backup path box, and select a folder where you want the program to store backup copies of any image file it modifies. (Recover your files here if something goes wrong – so far in thousands of files, I’ve needed to recover one file).
- Click on the Source Folder box and select a folder with images your want to annotate or cull.
- The first image it finds in the folder will be shown, and you’re off and running
Text Entry Areas
- Date Taken: from the JPEG file metadata, not editable
- Image File: the path and filename of the current file
- Copyright: an editable copyright message
- Title: the editable caption for the file
- Description: the editable full description for the file
- Prior Titles: the last 10 titles you saved – click on any to have them replace what is shown in the Title box
- Prior Descriptions: the last 10 descriptions you saved – click on any to have them replace what is shown in the Description box
- Copyright Text: the default copyright text – editable
- Warn If Unsaved: turn off warning if you move from an edited picture without saving
Controls
- Previous: move to the previous photo, saving nothing
- Next: move to the next photo, saving nothing
- Save/Next: move to the next photo, saving any edits
- Cull: move the photo to a folder named Other that is created in the source folder, saving nothing – no files are ever deleted
- Exit: same as clicking the red X in the upper right (nothing to save at the end, each photo you edit is saved as you go)
When you move to the next or previous image, MetaCaption will automatically fill the Title, Description or Copyright with that of the previous image shown, and change the filled text box blue so you can see that this happened. This feature, together with the Prior Titles and Prior Descriptions list, is what makes this program so fast to annotate photos.
If you have a question about MetaCaption, feel free to contact Ted from the Nesse.org website.